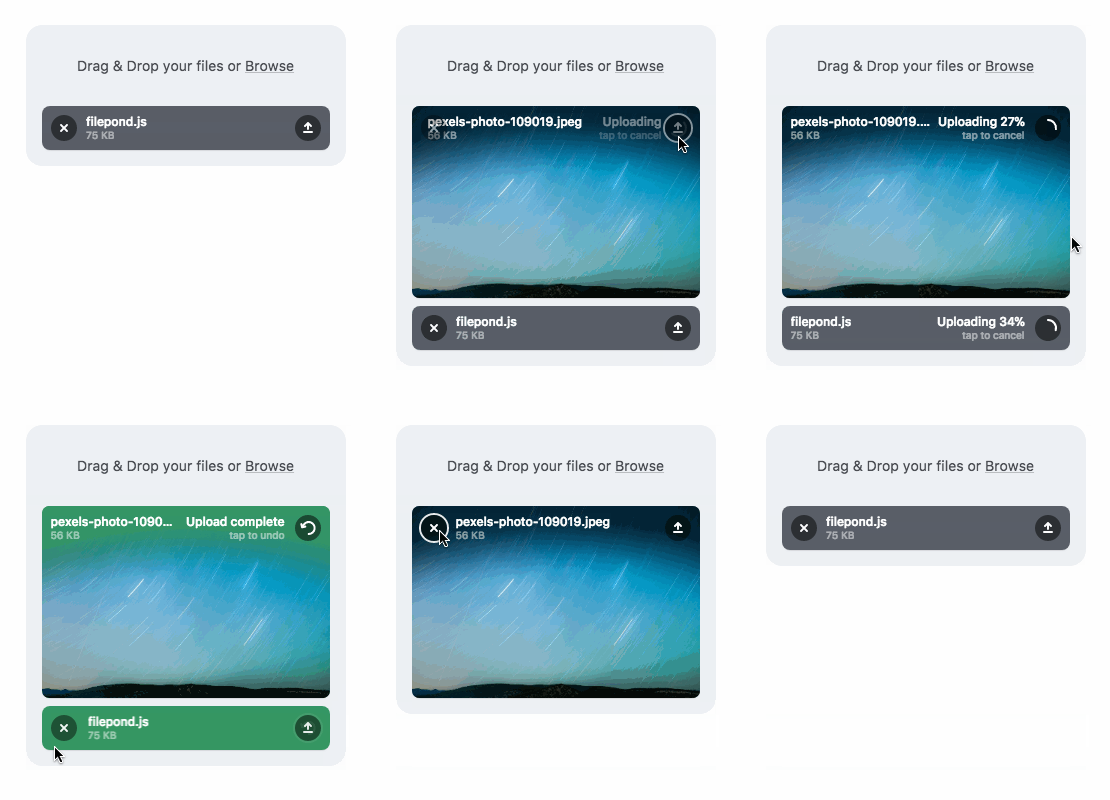
In today’s digital era, the ability to seamlessly upload files is crucial for web applications. However, managing file uploads efficiently while maintaining a sleek user interface can be a daunting task. This is where jQuery FilePond comes into play. jQuery FilePond is a versatile and user-friendly JavaScript library that simplifies file uploads and enhances user experience. In this article, we’ll delve into the features, benefits, and implementation of jQuery FilePond with practical examples.
Introduction to jQuery FilePond
jQuery FilePond is a customizable file upload library built with simplicity and performance in mind. It offers a wide range of features such as drag-and-drop support, image preview, file validation, and more. What sets jQuery FilePond apart is its intuitive user interface and seamless integration with various frameworks and libraries.

Key Features of jQuery FilePond
- Drag-and-Drop Support: Users can easily drag files from their desktop and drop them into the FilePond interface for uploading.
- Image Preview: jQuery FilePond automatically generates thumbnails for image files, providing users with a preview of their uploads.
- File Validation: It allows developers to specify file types, sizes, and other parameters for validation, ensuring that only valid files are accepted.
- Customizable UI: Developers can customize the look and feel of FilePond to match their application’s design using CSS or pre-built themes.
- Asynchronous Uploads: File uploads are performed asynchronously, preventing page reloads and providing a smooth user experience.
- Accessibility: jQuery FilePond is designed with accessibility in mind, making it compliant with web accessibility standards.
Getting Started with jQuery FilePond
To get started with jQuery FilePond, follow these simple steps:
- Install jQuery FilePond: Include the jQuery FilePond library in your project either by downloading it directly or using package managers like npm or Yarn.
- HTML Markup: Add the necessary HTML markup for FilePond to your webpage. This typically includes an input element with a specific class or ID.
- Initialize FilePond: Use JavaScript to initialize FilePond on the designated input element. You can also customize FilePond’s configuration options as per your requirements.
- Handle Upload Events: Implement event listeners to handle various upload events such as file selection, upload progress, and completion.
<!DOCTYPE html>
<html lang="en">
<head>
    <meta charset="UTF-8">
    <meta name="viewport" content="width=device-width, initial-scale=1.0">
    <title>jQuery FilePond Example</title>
    <link href="filepond.css" rel="stylesheet">
</head>
<body>
    <input type="file" class="filepond" name="filepond">

    <script src="jquery.min.js"></script>
    <script src="filepond.min.js"></script>
    <script>
        $(document).ready(function(){
            $('.filepond').filepond();
        });
    </script>
</body>
</html>
Conclusion
jQuery FilePond offers a robust solution for handling file uploads in web applications. Its intuitive interface, extensive feature set, and easy integration make it a preferred choice for developers looking to streamline the file upload process. By incorporating jQuery FilePond into your projects, you can enhance user experience and simplify file management tasks effectively. Start using jQuery FilePond today and take your file upload experience to the next level!
Remember, simplicity and efficiency are key when it comes to file uploads, and jQuery FilePond delivers on both fronts.
